


There are currently no product reviews.
NOTE: Reviews require prior approval before they will be displayed
NOTE: Reviews require prior approval before they will be displayed
Sponsors.jpg "Digimaster 3") - More
|
368A Vertical Car Household Key Copy Cutting Dulplicated Machine Locksmith Picking Tool 220V TOP 4 Reasons to get 368A Key Copy Cutting Machine
368A Key Copy Cutting Machine Parameters Dimension size:30 *21*35cm Weight:10kg (Volume weight) Voltage:110V~220v
Frequency:50/60Hz
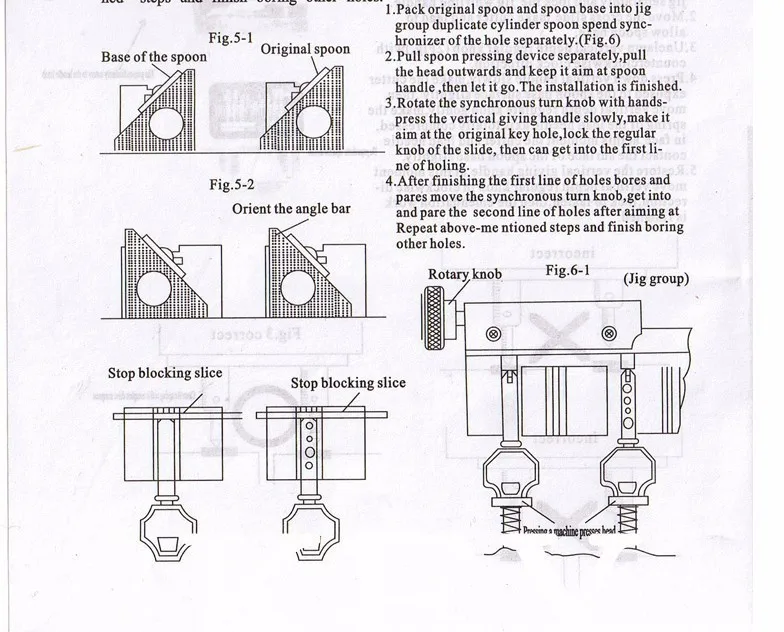
Plug Type: UK.USA.CN.EU  Packing list: 1* 368A Key Cutting Machine ZC`WU9{2WOB3I6V_JB.png)  How to Operate368A Key Copy Cutting Machine ? The change of the cutter and leading needle: 1.Use inner hexagonal wrench to unclamp the regular screw anticlockwise direction. 2.Draw out the cutter and the lead needle downward,separate them from axis. 3.Insert the new cutter and leading needle in the axis,when suitable for in its flexble position(Fig.1),fix the screw to lock in clockwise direction with inner hexagonal wrench. Note: Cutter and lead needle must the same angle(hole type cut) or the same diameter(wave type cut), otherwise it is inaccureate to duplicate. 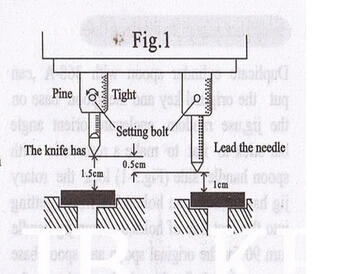 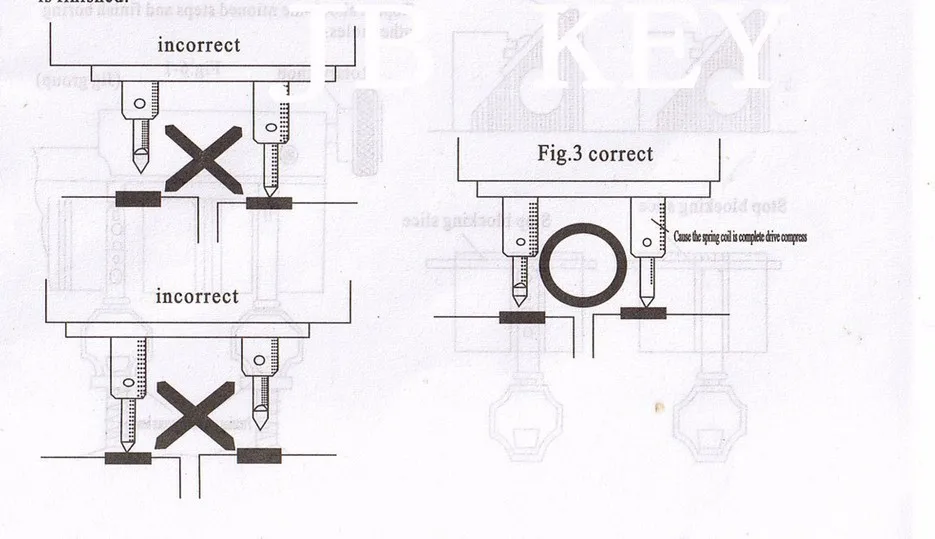 1. Pack original spoon and spoon base into jig group dupicate cylinder spoon spend synchronizer of the hole separately(Fig.6)
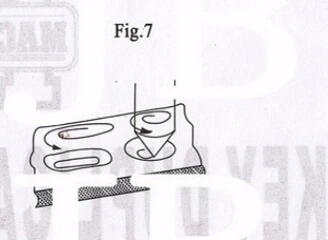
The cannelure reaming boring and paring
The cuts of the wave type cannelure:
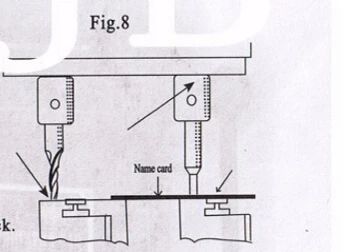
6. Put the original key into the jig and lock the rotary handle of the jig.
8. Pack the jig into the base of the spoon,and move the handle of the jig,fasten it.
24hour Online Customer Service: There are currently no product reviews.
NOTE: Reviews require prior approval before they will be displayed
Customer Videos: See all 0 videos
Customer Images: See all 0 images
This product was added to our catalog on Thursday 14 September, 2017. |

![]()
![]()
Copyright ©2018 Autocardiag.com. All rights reserved
